Mastering the Art of Time Lapse Video Creation
In the world of digital media, time lapse videos have gained unprecedented popularity. This fascinating technique allows viewers to witness scenes evolving over time in a condensed duration, creating a captivating visual experience. Whether you are a budding photographer, a seasoned professional, or a real estate agent looking to increase your online presence, knowing how to make video time lapse can elevate your content and engage your audience.
Understanding Time Lapse Videos
Time lapse photography involves capturing a series of images at set intervals over a period of time, which are then played back at a faster rate. The overall effect showcases gradual changes in a visually striking manner. This technique is widely used in various fields, from documenting the construction of buildings to showcasing the beauty of natural landscapes.
Key Elements of Time Lapse Video
- Subject: Choose dynamic subjects that show visible changes over time.
- Interval: Define the time intervals between shots based on the motion of your subject.
- Duration: Decide how long you will be shooting before editing.
- Playback Speed: Determine the speed at which you want the video to be played back.
Why Use Time Lapse in Photography and Real Estate?
Time lapse videos are not just visually appealing; they also serve functional purposes, particularly in fields such as photography and real estate. Here are several benefits:
1. Captivating Visual Storytelling
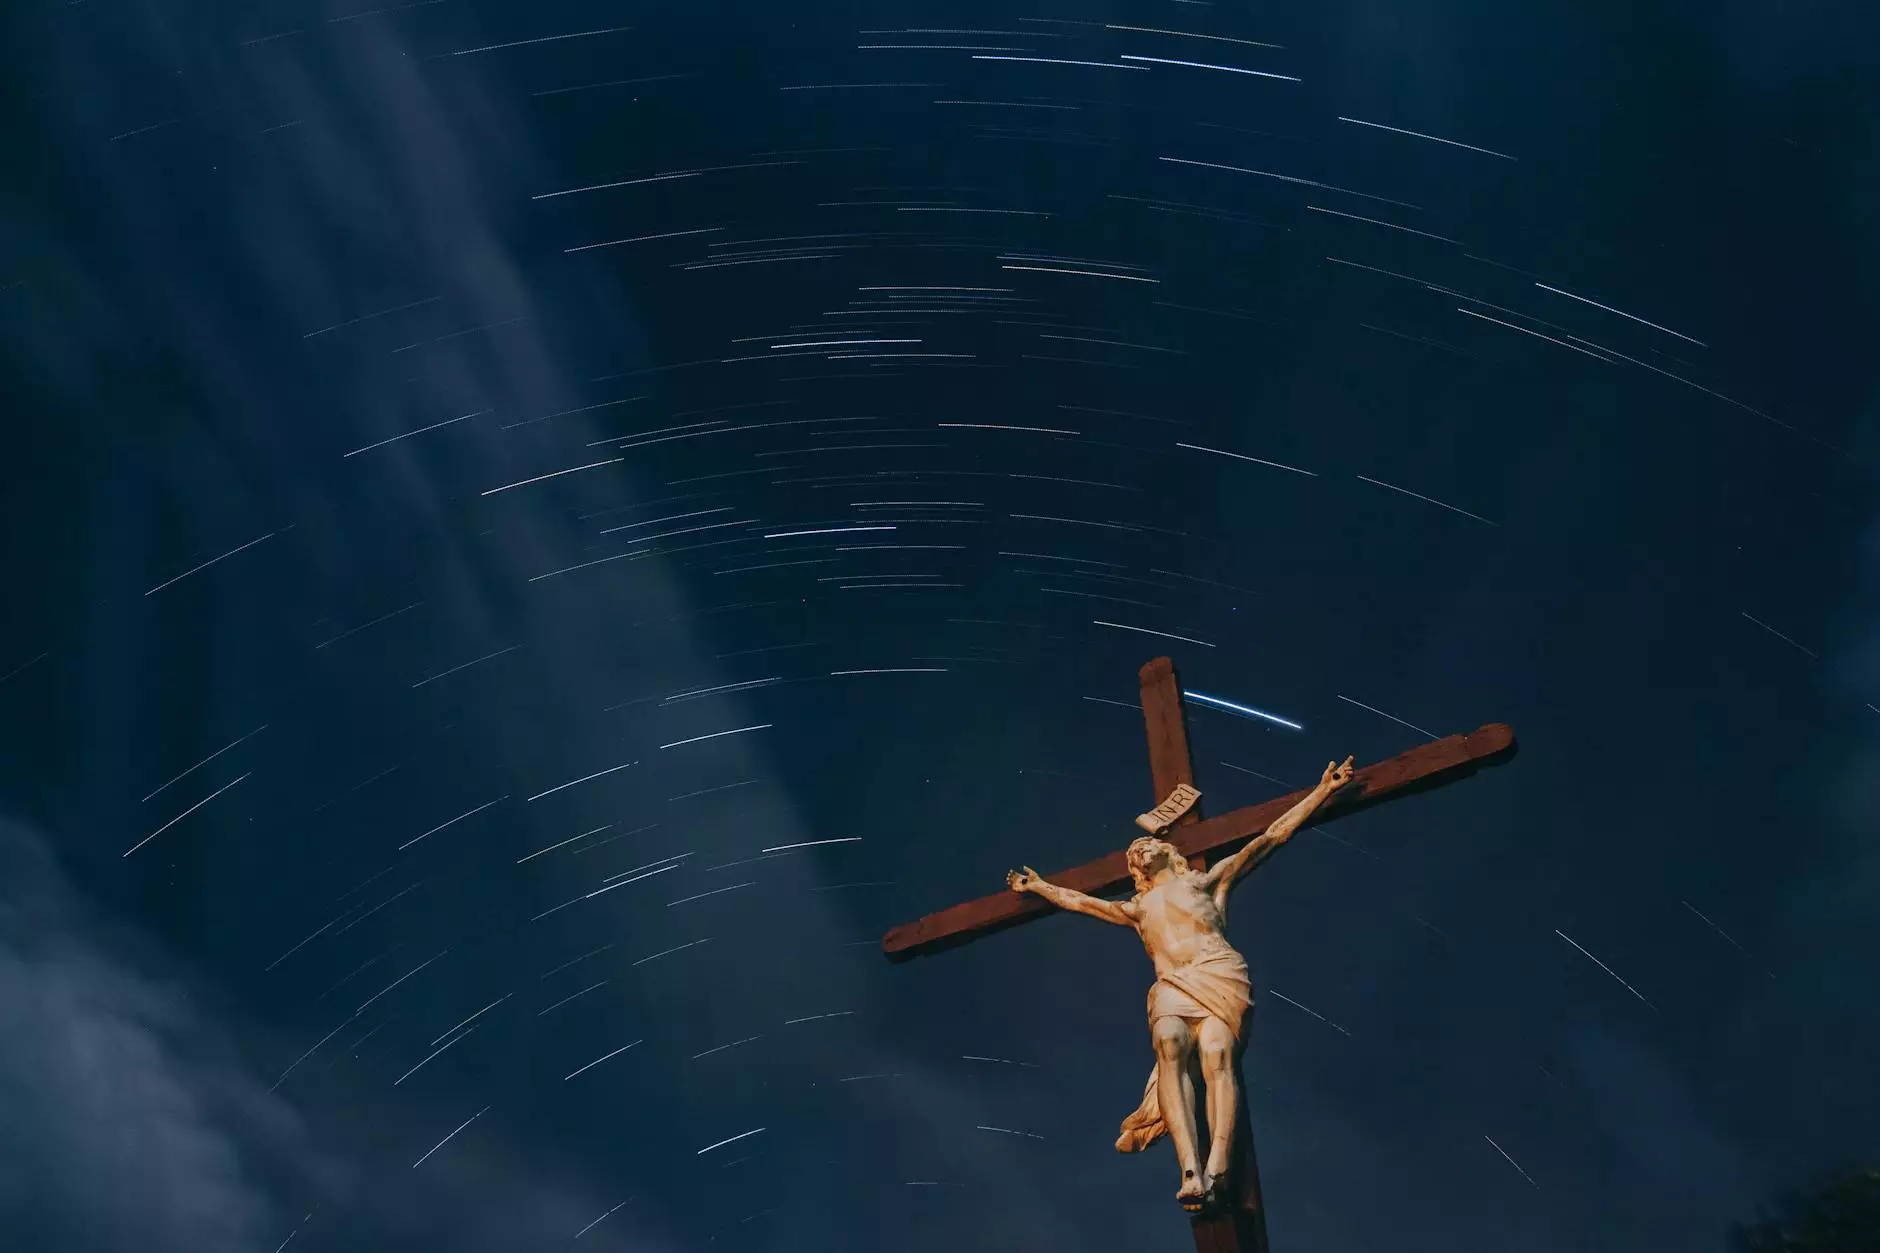
Incorporating time lapse videos into your photography portfolio or real estate listings can create a compelling narrative. For instance, a time lapse of a property’s transformation can visually convey the improvement journey, while showcasing vibrant sunsets or star trails can enhance your landscape collection.
2. Boosting Engagement
Time lapse videos tend to capture viewers’ attention more effectively than still images or regular videos. This increased engagement can translate to better interaction rates on social media platforms and higher view counts on video-sharing websites. For real estate professionals, attractive visuals can lead to increased interest in properties.
3. Highlighting Changes
Real estate is all about change—whether you are promoting a new listing or showcasing a renovation. Time lapse videos can effectively highlight these changes in a short span, providing potential buyers with a clear and engaging view of the property’s features and enhancements.
The Equipment You Need to Make Video Time Lapse
To create captivating time lapse videos, having the right equipment is crucial. Here is a detailed list of the essentials:
1. Camera
While you can use a smartphone to capture time lapse videos, a digital camera with manual settings will provide superior image quality and flexibility. Popular choices include Nikon, Canon, and Sony cameras that support time lapse photography.
2. Tripod
A sturdy tripod is essential for stabilizing your shots over the duration of the recording. Even the slightest movement can disrupt the fluidity of your time lapse, so invest in a quality tripod.
3. Intervalometer
Many cameras today come with built-in intervalometers, but if yours doesn’t, consider purchasing an external one. This device allows you to set the intervals for taking pictures automatically without any manual intervention.
4. Editing Software
Once your photos are taken, you will need editing software to compile them into a cohesive video. Popular software options include Adobe Premiere Pro, Final Cut Pro, and free options like iMovie. These programs contain easy-to-use features designed for video editing, particularly time lapse compilation.
Steps to Make Video Time Lapse: A Comprehensive Guide
Creating a stunning time lapse video involves several steps, which we will explore in detail below.
Step 1: Pre-Production Planning
Before hitting the record button, it’s important to plan your shoot:
- Choose Your Location: Select a site that has dynamic elements, such as moving clouds, flowing water, or bustling city life.
- Scout Your Scene: Visit the location beforehand to understand the light conditions and the best angle for capturing your subject.
- Set Your Goals: Define what you want to achieve. Will it be a minimalist view or a bustling street filled with activity? Having clear objectives can guide your shooting process.
Step 2: Setting Up Your Equipment
With your plan in place, it’s time to set up:
- Assemble the Tripod: Position your tripod securely at your chosen angle.
- Camera Settings: Manual mode is preferred. Set your ISO, aperture, and shutter speed appropriately. For daylight, keeping it around 100-400 ISO is recommended.
- Set the Interval: Calculate your interval based on the motion speed of your subject and how long you plan to shoot.
Step 3: Recording Your Time Lapse
Once your equipment is set up:
- Start Capturing: Begin the recording process and ensure everything is functioning as intended. It’s advisable to monitor progress in the beginning to avoid any technical issues.
- Allow for Patience: Time lapse shoots can last several hours. Make sure you have everything prepared to avoid interruptions.
Step 4: Editing the Footage
After capturing your images, import them into your editing software:
- Compile Images: Use the software to arrange the sequence of your images into a timeline.
- Adjust Playback Speed: Modify the frame rate to achieve the desired speed of your video.
- Add Music or Effects: Consider enhancing your video with music, text overlays, or color grading to make it visually appealing.
Step 5: Exporting and Sharing
Once you are satisfied with your creation, it’s time to export your video:
- Select the Right Format: Export your video in formats like MP4 or MOV for optimal compatibility across platforms.
- Sharing Online: Upload your completed time lapse video to social media, YouTube, or your website, ensuring you use engaging titles and descriptions to increase visibility.
Tips for Stunning Time Lapse Videos
Here are some tips to consider when making video time lapse:
- Use ND Filters: Neutral density filters can help manage exposure in bright conditions by reducing the amount of light entering your lens.
- Experiment with Angles: Try various angles and positions to see how different perspectives can change the narrative.
- Track Changes Over Time: If applicable, consider shooting the same scene at different times of day to showcase varying lighting conditions.
- Practice Makes Perfect: Don’t hesitate to experiment with different subjects and settings. The more you practice, the better your results will become.
Conclusion
In conclusion, learning how to make video time lapse opens a whole new realm of creativity in photography and videography. By understanding the techniques, equipment, and processes involved, you can produce stunning time lapse videos that resonate with your audience, whether you are a hobbyist or a real estate professional looking to highlight properties in an innovative way. Remember, patience and planning are key, and the results will often surpass your expectations.
For photographers and real estate enthusiasts, the power of time lapse videos can significantly enhance your storytelling approach, making your work stand out in today’s crowded digital landscape. So, gather your equipment, find a compelling scene, and start capturing those beautiful moments!